Tag: Visual edit |
m (Added links for new pages.) Tag: Visual edit |
||
| (31 intermediate revisions by 5 users not shown) | |||
| Line 1: | Line 1: | ||
| + | {{Game|image1=Screenshot 32.png|game_by=*FlyAnvil.com |
||
| − | '''Decision 3''' is the 4th game of the [[Decision series]] that was released on November 14, 2014. |
||
| + | *Fly Anvil s.r.o.|thanks_to=*Seamless Software |
||
| + | *Mary Harris |
||
| + | *Jackovlev Alexander |
||
| + | *Yeffry Filipe |
||
| + | *MrDayCee|voice_by=fiverr.com|music_by=musicloops.com|sound_by=StockMusic.com|sponsor=ArmorGames.com|version=1.17ad|previous_game=[[Decision Medieval]]|following_game=[[Decision 4: Red Daze]]|released=November 14, 2014}} |
||
| + | |||
| + | '''Decision 3''' is the 4th game of the [[Decision series]] that was released on November 14, 2014.[[File:Screenshot_33.png|thumb|Decision 3 :Town Boundary Map]] |
||
| + | |||
| + | == Storyline == |
||
| + | Following their success in [[Decision 2]] the survivor pushes on into yet another infested city. |
||
| + | |||
| + | ==The City== |
||
| + | |||
| + | #Border area |
||
| + | #Coldwater area |
||
| + | #Massacre |
||
| + | #Westside area |
||
| + | #Commonwealth area |
||
| + | #Grayditch area |
||
| + | #Den |
||
| + | # Broken Hills area |
||
| + | #Freeside area |
||
| + | #Reservation Camps A, B and C |
||
| + | |||
| + | == Enemies == |
||
| + | The city has been overrun by zombies in the south west and a powerful mutant faction in the north east. |
||
| + | |||
| + | ===[[:Category:Zombie|Zombies]]=== |
||
| − | [[File:Screenshot_32.png|thumb|Decision 3]][[File:Screenshot_33.png|thumb|Decision 3 :Town Boundary Map]] |
||
| − | ==Enemies== |
||
#[[Zombie Roamer]] |
#[[Zombie Roamer]] |
||
| − | #[ |
+ | #[[Zombie Reaver]] |
#[[Feral Zombie]] |
#[[Feral Zombie]] |
||
#[[Burning Ghoul]] |
#[[Burning Ghoul]] |
||
| Line 11: | Line 37: | ||
#[[Zombie Warg]] |
#[[Zombie Warg]] |
||
#[[Zombie Troll]] |
#[[Zombie Troll]] |
||
| − | #Giant Zombie Troll |
+ | #[[Giant Zombie Troll]] |
| − | #Zombie God Troll (Found at the bottom of Massacre) |
+ | #[[Zombie God Troll]] (Found at the bottom of Massacre) |
| + | |||
| + | ===[[:Category:Mutant|Mutants]]=== |
||
| + | |||
#[[Mutant Peon]] |
#[[Mutant Peon]] |
||
#[[Mutant Warrior]] |
#[[Mutant Warrior]] |
||
| − | #Mutant Brute |
+ | #[[Mutant Brute]] |
| − | #Mutant Master |
+ | #[[Mutant Master]] |
| − | #Mutant Captain |
+ | #[[Mutant Captain]] |
#[[Wolf Mutant]] |
#[[Wolf Mutant]] |
||
| − | #Wulver Mutant |
+ | #[[Wulver Mutant]] |
#[[Super Mutant]] |
#[[Super Mutant]] |
||
| − | #Super Mutant Overlord |
+ | #[[Super Mutant Overlord]] |
| − | #Super Mutant Boss (Find the bottom of the right of Den and |
+ | #[[Super Mutant Boss]] (Find in the bottom of the right of Den and in the Freeside area) |
| + | ==Weapons== |
||
| − | #Quân đội - Giống như Người lính, nhưng không thể tương tác và chiến đấu bất bại |
||
| + | {| class="article-table sortable" |
||
| − | #Engineer - Adds 150 income per day if on team. |
||
| + | |+ |
||
| − | #Soldier - Simple Soldier with a rifle |
||
| + | !Class/Name |
||
| − | #Builder - If on team, each engineer in team adds 5 materials per day. |
||
| + | !Max damage |
||
| − | #Ranger - adds 5 materials per day if on team. |
||
| + | !+ max exp |
||
| − | #Captain - Useful for combat and upgrades. Has a Lee-Enfield. |
||
| + | !Best reload |
||
| − | #Civilian - Brings in 100 money per day if on team. |
||
| + | !Clip |
||
| − | #Inspector - Unlocks upgrades in armory. |
||
| + | ! Distance |
||
| − | ##Armord, Location: Border Area - "Direct Action" |
||
| + | !Reward |
||
| − | ##Mark, Location: Coldwater Area - "Outpost Rebuild" |
||
| + | !Notes |
||
| − | ##Jonson, Location: Westside Area - "Factory Capture" |
||
| − | ##Rob, Location: Commonwealth Area - "Recon" |
||
| − | ##Rock, Location: Broken Hills Area - "Outpost Rebuild" |
||
| − | ##Porterfield, Location: Freeside Area(The last unlocked area) - "Factory Capture" (couldn't be found if you are playing in easy difficulty ) |
||
| − | |||
| − | === Teammates === |
||
| − | {| class="article-table" |
||
| − | |[[File:Team - Soldier 2-1.png|left|thumb|100x100px]] |
||
| − | |Soldier is required for Outpost and Shelter upgrades. Can be recruited for missions (Requires ability "Commander"). |
||
| − | Military is same as soldier, but can not be interacted with and cannot die. |
||
|- |
|- |
||
| + | |[[:Category:Pistol|01P1]] / [[Colt|Colt Python]] |
||
| − | |[[File:Team - Captain 2.png|thumb|103x103px|left]] |
||
| + | | |
||
| − | |Captain is required for Outpost and Factory upgrades. Can be recruited for missions (Requires ability "Commander"). It looks like he has a Has a Lee-Enfield for his firearm |
||
| + | | |
||
| + | | |
||
| + | | |
||
| + | | |
||
| + | |100% |
||
| + | |Fires rage |
||
|- |
|- |
||
| + | |[[:Category:Pistol|01P2]] / [[Beretta|Beretta Cheetah]] |
||
| − | |[[File:Team - Ranger 2.png|thumb|103x103px|left]] |
||
| + | |56 |
||
| − | |Ranger is required for Outpost upgrades. Being in the team each Ranger obtain 5 Materials per day. Can be recruited for missions (Requires ability "Commander"). |
||
| + | | |
||
| + | |2 |
||
| + | |10 |
||
| + | |600 |
||
| + | | 100% |
||
| + | |Fires rage |
||
|- |
|- |
||
| + | |[[:Category:Pistol|01P3]] / [[Desert Eagle]] |
||
| − | |[[File:Team - Engineer.png|left|thumb|100x100px]] |
||
| + | |100 |
||
| − | |Engineer is required for Outpost and Factory upgrades. Being in the team each Engineer obtain 150 money per day. |
||
| + | |140 |
||
| + | |2 |
||
| + | |15 |
||
| + | |800 |
||
| + | |100% |
||
| + | |Fires rage |
||
|- |
|- |
||
| + | |[[:Category:Shotgun|02S1]] / [[Coach Gun]] |
||
| − | |[[File:Team - Builder.png|left|thumb|100x100px]] |
||
| + | |60 |
||
| − | |Builder is required for Outpost and Factory upgrades. Being in the team each Engineer [sic] obtain 5 materials per day. |
||
| + | | |
||
| + | | |
||
| + | | |
||
| + | |300 |
||
| + | |70% |
||
| + | | |
||
|- |
|- |
||
| + | |[[:Category:Shotgun|02S2]] / [[Winchester]] |
||
| − | |[[File:Team - Citizen.png|left|thumb|100x100px]] |
||
| + | |120 |
||
| − | |Citizen is required for Shelter upgrades. Being in the team each Citizen obtain 100 money per day. |
||
| − | | |
+ | | |
| + | | |
||
| − | |||
| + | | |
||
| − | === Inspectors === |
||
| + | |350 |
||
| − | {| class="article-table" |
||
| + | |70% |
||
| − | ! |
||
| + | | |
||
| − | !Name |
||
| − | !Location |
||
| − | !Notes |
||
|- |
|- |
||
| + | |[[:Category:Shotgun|02S3]] / [[Remington]] |
||
| − | |[[File:Inspector - Armord.png|thumb|48x48px|none]] |
||
| + | |200 |
||
| − | |Armored the Inspector |
||
| + | | |
||
| − | |Border Area - "Direct Action" |
||
| + | | |
||
| + | | |
||
| + | |400 |
||
| + | |70% |
||
| |
| |
||
|- |
|- |
||
| + | |[[:Category:Automatic|03A1]] / MP5 |
||
| − | |[[File:Inspector - Jonson.png|left|thumb|47x47px]] |
||
| + | | |
||
| − | |Jonson the Inspector |
||
| + | | |
||
| − | |Coldwater Area - "Outpost Rebuild" |
||
| + | | |
||
| + | | |
||
| + | | |
||
| + | |70% |
||
| |
| |
||
|- |
|- |
||
| + | |[[:Category:Automatic|03A2]] / AK74 |
||
| − | |[[File:Inspector - Mark.png|left|thumb|48x48px]] |
||
| + | | |
||
| − | |Mark the Inspector |
||
| + | | |
||
| − | |Westside Area - "Factory Capture" |
||
| + | | |
||
| + | | |
||
| + | | |
||
| + | |70% |
||
| |
| |
||
|- |
|- |
||
| + | |[[:Category:Automatic|03A3]] / [[M60]] |
||
| + | |70 |
||
| |
| |
||
| + | |3 |
||
| + | |40 |
||
| + | | 700 |
||
| + | |70% |
||
| |
| |
||
| + | |- |
||
| + | |[[:Category:Sniper Rifle|04SR1]] / [[Enfield]] |
||
| |
| |
||
| + | | |
||
| + | | |
||
| + | | |
||
| + | | |
||
| + | |70% |
||
| |
| |
||
|- |
|- |
||
| + | |[[:Category:Sniper Rifle|04SR2]] / [[Dragunov]] |
||
| − | |[[File:Inspector - Rob.png|left|thumb|48x48px]] |
||
| + | | |
||
| − | |Rob the Inspector |
||
| + | | |
||
| − | |Commonwealth Area - "Recon" |
||
| + | | |
||
| + | | |
||
| + | | |
||
| + | |70% |
||
| |
| |
||
| − | Find in simple mode |
||
|- |
|- |
||
| + | |[[:Category:Sniper Rifle|04SR3]] / [[Barrett]] |
||
| + | |210 |
||
| + | |260 |
||
| + | | |
||
| |
| |
||
| + | |1700 |
||
| − | |Rock the Inspector |
||
| + | |70% |
||
| − | |Broken Hills Area - "Outpost Rebuild" |
||
| |
| |
||
|- |
|- |
||
| + | |[[:Category:Machine Gun|05MG1]] / Browning |
||
| |
| |
||
| − | |Portfield the Inspector |
||
| − | |Freeside Area(The last unlocked area) - "Factory Capture" |
||
| |
| |
||
| + | | |
||
| − | Found at home |
||
| + | | |
||
| − | |||
| + | | |
||
| + | |60% |
||
| + | | |
||
| + | |- |
||
| + | |[[:Category:Machine Gun|05MG2]] / Slostin |
||
| + | | |
||
| + | | |
||
| + | | |
||
| + | | |
||
| + | | |
||
| + | | 60% |
||
| + | | |
||
| + | |- |
||
| + | |[[:Category:Machine Gun|05MG3]] / [[Minigun]] |
||
| + | |70 |
||
| + | | |
||
| + | |5 |
||
| + | |40 |
||
| + | |600 |
||
| + | |60% |
||
| + | | |
||
| + | |- |
||
| + | |[[:Category:Rocket Launcher|06RL1]] / [[Bazooka]] |
||
| + | |84 |
||
| + | | |
||
| + | |4 |
||
| + | |1 |
||
| + | | |
||
| + | |70% |
||
| + | | - Move |
||
| + | |- |
||
| + | |[[:Category:Rocket Launcher|06RL2]] / [[RPG]] |
||
| + | |123 |
||
| + | | |
||
| + | |4 |
||
| + | |1 |
||
| + | | |
||
| + | |70% |
||
| + | | - Move |
||
| + | |- |
||
| + | |[[:Category:Rocket Launcher|06RL3]] / [[Stinger]] |
||
| + | |185 |
||
| + | | |
||
| + | |4 |
||
| + | |1 |
||
| + | | |
||
| + | |70% |
||
| + | | - Move |
||
| + | |- |
||
| + | |[[:Category:Grenade|07G1]] / Mills Bomb |
||
| + | | |
||
| + | | |
||
| + | | |
||
| + | |1 |
||
| + | | |
||
| + | |30% |
||
| + | | |
||
| + | |- |
||
| + | |[[:Category:Grenade|07G2]] / F1 Grenade |
||
| + | | |
||
| + | | |
||
| + | | |
||
| + | |1 |
||
| + | | |
||
| + | |30% |
||
| + | | |
||
| + | |- |
||
| + | |[[:Category:Grenade|07G3]] / [[Z Grenade]] |
||
| + | |130 |
||
| + | | |
||
| + | |3 |
||
| + | |1 |
||
| + | | |
||
| + | |30% |
||
| + | | |
||
| + | |- |
||
| + | |[[:Category:Mines|08Mi]] / [[Panzermine]] |
||
| + | |250 |
||
| + | |320 |
||
| + | |1.5 |
||
| + | | 1 |
||
| + | | |
||
| + | |70% |
||
| + | | |
||
| + | |- |
||
| + | |[[:Category:Flamethrower|09F1]] / ROKS Flamethrower |
||
| + | | |
||
| + | | |
||
| + | | |
||
| + | | |
||
| + | | |
||
| + | | |
||
| + | | |
||
| + | |- |
||
| + | |[[:Category:Flamethrower|09F2]] / [[Flammenwerfer]] |
||
| + | |56 |
||
| + | | |
||
| + | |5 |
||
| + | | |
||
| + | | |
||
| + | |70% |
||
| + | | - Move |
||
| + | |- |
||
| + | |[[:Category:Flamethrower|09F3]] / [[M2 Flamethrower]] |
||
| + | |100 |
||
| + | | |
||
| + | | 3 |
||
| + | | |
||
| + | | |
||
| + | | |
||
| + | | |
||
| + | |- |
||
| + | |[[:Category:Melee|10Me1]] / Combat Knife |
||
| + | | |
||
| + | | |
||
| + | | 0 |
||
| + | |0 |
||
| + | |0 |
||
| + | |300% |
||
| + | | |
||
| + | |- |
||
| + | |[[:Category:Melee|10Me2]] / Crowbar |
||
| + | | |
||
| + | | |
||
| + | |0 |
||
| + | |0 |
||
| + | |0 |
||
| + | |300% |
||
| + | | |
||
| + | |- |
||
| + | |[[:Category:Melee|10Me3]] / [[Machete]] |
||
| + | |250 |
||
| + | | 280 |
||
| + | |0 |
||
| + | |0 |
||
| + | |0 |
||
| + | |300% |
||
| + | | |
||
| + | |- |
||
| + | |[[:Category:Shield|11S]] / [[Ballistic Shield]] |
||
| + | |120 |
||
| + | |160 |
||
| + | | |
||
| + | | |
||
| + | | 800 |
||
| + | |80% |
||
| + | | Fires rage |
||
| + | + Armor |
||
| + | |- |
||
| + | |[[:Category:Bow|12B]] / [[Phantom Bow]] |
||
| + | |130 |
||
| + | | |
||
| + | | |
||
| + | |1 |
||
| + | |1500 |
||
| + | |70% |
||
| + | | |
||
|} |
|} |
||
| + | == Teammates== |
||
| − | == <u>'''''Weapons'''''</u> == |
||
| + | ===Soldier=== |
||
| − | <blockquote><u>Colt Python</u></blockquote>Base Damage: 12 |
||
| − | [[File: |
+ | [[File:Team - Soldier 2-1.png|right|50x50px]] |
| + | Soldiers are required for most Outpost and Shelter upgrades. They can also be recruited for missions with the "Commander" ability for 100 Money. Not to confused with their non-interactable "Military" variant. |
||
| − | Fire Rate: Average (2/second) |
||
| + | ===Captain=== |
||
| + | [[File:Team - Captain 2.png|right|50x50px]] |
||
| + | Captains are required for some Outpost and Factory upgrades. They can also be recruited for missions with the "Commander" ability for 150 Money. |
||
| + | === Ranger=== |
||
| + | [[File:Team - Ranger 2.png|right|50x50px]] |
||
| + | Rangers are required for Outpost upgrades and each one in the team creates 5 Materials per day. They can also be recruited for missions with the "Commander" ability for 100 Money. |
||
| + | ===Engineer=== |
||
| + | [[File:Team - Engineer.png|right|50x50px]] |
||
| + | Engineers are required for Outpost and Factory upgrades and each one in the team earns 150 Money per day. |
||
| + | ===Builder=== |
||
| + | [[File:Team - Builder.png|right|50x50px]] |
||
| + | Builders are required for Outpost and Factory upgrades upgrades and each one in the team creates 5 Materials per day. |
||
| + | === Citizen=== |
||
| + | [[File:Team - Citizen.png|right|50x50px]] |
||
| + | Citizens are required for Shelter upgrades and each one in the team earns 100 Money per day. |
||
| + | ==Inspectors== |
||
| − | Clip Size: 7 |
||
| + | Decision 3 also introduces Inspectors, a group of NPCs who can be found throughout the city and once guided to shelter unlock more weapons, armour and abilities. |
||
| + | *[[Armord the Inspector|Armord]] - Border Area |
||
| − | Reload Time: 2 Seconds |
||
| + | *[[Jonson the Inspector|Jonson]] - Coldwater Area |
||
| + | *[[Mark the Inspector|Mark]] - Westside Area |
||
| + | *[[Rob the Inspector|Rob]] - Commonwealth Area |
||
| + | *[[Rock the Inspector|Rock]] - Broken Hills Area |
||
| + | *[[Porterfield the Inspector|Porterfield]] - Freeside Area (Can't be found on Easy difficulty) |
||
| + | ==Armor== |
||
| − | Range: 300 |
||
| + | [[File:Underwear D3.png|right]] |
||
| + | ===Underwear=== |
||
| − | Reward: 100%' |
||
| + | *Armor: 25% (5% + 20% exp) |
||
| − | In-game description: "The Colt Python is a powerful, 6 shot, double-action revolver manufactured by the U.S. company Colt's Manufacturing of Hartford since 1995. Some fire arm collectors and writers have described the Python as the finest production revolver ever made."<blockquote><u>Coach Gun</u></blockquote>Base Damage: 28 |
||
| + | *Speed: +5% |
||
| − | [[File:Coach Gun.PNG|thumb|60x60px]] |
||
| − | Fire Rate Average (2/second) |
||
| + | In-game description: "Typical army jersey made of cotton. Provides no protection against damage. Does not hinder movements so you can run in it only where there is a lack of threat." |
||
| − | Distance: 300 (Spread) |
||
| + | [[File:Leather Jacket D3.png|right]] |
||
| − | Reward: 70% |
||
| + | === Leather Jacket=== |
||
| − | In-game description: "Type of gun, made by shortening the barrel and butt. This gives the advantage of small size which allows for concealed carry and easy to maneuver. Large scattering makes it ineffective at long distance. Improvements of the barrel shortening make it much more effective gun." |
||
| + | *Starting armor: |
||
| − | == '''''<u>Armor</u>''''' == |
||
| + | *Max armor: 45% (25% + 20% exp) |
||
| − | <blockquote><u>Underwear</u></blockquote>[[File:Underwear.PNG|thumb|65x65px]] |
||
| − | + | *Speed: -10% |
|
| + | In-game description: "Lightweight body armor composed of ceramic plates. Mainly protects human torso. Reduces damage and has a negligible effect on the ability to move." |
||
| − | Speed: +5% |
||
| + | [[File:Combat Armor D3.png|right]] |
||
| − | In-game description: Typical army jersey made of cotton. Provides no protection against damage. Does not hinder movements so you can run in it only where there is a lack of threat." |
||
| + | ===Combat Armor=== |
||
| − | == <u>'''''Skills'''''</u> == |
||
| − | ''All skills max out at level 3, except for Rage Injection.'' |
||
| − | * Stamina- Increases maximum health and regeneration rate. |
||
| + | *Starting armor: 15% |
||
| − | * Engineering- In game description: "Engineering allows improvement of Outposts, Factories and Shelters to a higher level." |
||
| + | *Max armor: 60% (40% + 20% exp) |
||
| + | *Speed: -20% |
||
| + | In-game description: "Medium leather armor with stitched metal plates. Protects the entire upper part of the body. The best ratio between the protection from damage and mobility. Reduces damage and reduces speed of movement." |
||
| − | * Hacker- Allows you to "hack" into ATMs, which gets you cash. You can only hack into ATMs that are at or below your hacking level. Along with that, you can hack into Storehouses, which are harder to find. |
||
| + | [[File:Kevlar Armor D3.png|right]] |
||
| − | * Detector- Gives an in-game map that can be accessed anytime, and upgrades allow you to see more things, such as enemies, allies, and stashes. Tap the keyboard key "Z" to activate (and deactivate) the detector (if unlocked). Hold "Z" to access the map. |
||
| + | ===Kevlar Armor=== |
||
| + | |||
| − | * Commander- Lets you have companions that follow you around and kill zombies. Upgrade to increase max team size. |
||
| + | *Starting armor: 20% |
||
| + | *Max armor: 80% (60% + 20% exp) |
||
| + | *Speed: -30% |
||
| + | |||
| + | In-game description: "Heavy armor made from balistic fabric and titanium plates. Protects the entire human body from any kind of damage to the maximum. Because of the heavy weight most often used only for defensive purposes. Significantly reduces damage however, greatly reduces the movement speed." |
||
| + | |||
| + | == Skills== |
||
| + | ''All skills max out at level 3, except for Rage Injection and Taunt.'' |
||
| + | |||
| + | *Stamina - Increases maximum health and regeneration rate. |
||
| + | |||
| + | #Max Health: 250, Regeneration: 6 per second. |
||
| + | #Max Health: 300, Regeneration: 12 per second. |
||
| + | #Max Health: 370, Regeneration: 16 per second. |
||
| + | |||
| + | # |
||
| + | |||
| + | *Engineering - In game description: "Engineering allows improvement of Outposts, Factories and Shelters to a higher level." |
||
| + | |||
| + | # ? |
||
| + | #? |
||
| + | # Required for: Third Outpost Armament upgrade Workshops III, the Factory upgrade. |
||
| + | |||
| + | *Hacker - Allows you to "hack" into ATMs, which gets you cash. You can only hack into ATMs that are at or below your hacking level. Along with that, you can hack into Storehouses, which are harder to find. |
||
| + | |||
| + | #Access to Level 1 ATMs and Storehouses. |
||
| + | #Access to Level 2 ATMs and Storehouses. |
||
| + | #Access to Level 3 ATMs and Storehouses. |
||
| + | |||
| + | # |
||
| + | |||
| + | *Detector - Gives an in-game map that can be accessed anytime, and upgrades allow you to see more things, such as enemies, allies, and stashes. Tap the keyboard key "Z" to activate (and deactivate) the detector (if unlocked). Hold "Z" to access the map. |
||
| + | |||
| + | #Detects Enemies (Red/Red with skull) and Useful places (Yellow). |
||
| + | #Detects Enemies (Red/Red with skull), Useful places (Yellow), Allies (Green) and Loot (Pink). |
||
| + | #Detects Enemies (Red/Red with skull), Useful places (Yellow), Allies (Green), Loot (Pink) and Stashes (Blue). |
||
| + | |||
| + | # |
||
| + | |||
| + | *Commander - Lets you have companions that follow you around and kill zombies. Upgrade to increase max team size. |
||
| + | |||
| + | #Space for 1 companions |
||
| + | #Space for 3 companions |
||
| + | #Space for 6 companions. |
||
| + | |||
| + | # |
||
* Agility - Improves default walking speed and lets you sprint if you hold the "Shift" key on your keyboard, which doesn't allow you to fire, but increases speed drastically. Upgrading this will further increase your walking speed, sprinting speed, and duration of the sprint. |
* Agility - Improves default walking speed and lets you sprint if you hold the "Shift" key on your keyboard, which doesn't allow you to fire, but increases speed drastically. Upgrading this will further increase your walking speed, sprinting speed, and duration of the sprint. |
||
| + | #Default speed: 110%, Sprint speed: 140% |
||
| − | * Stability - Holding the Spacebar down will activate Stability. You cannot move, but knockback resistance and armor are increased. Upgrades increase the amount of knockback resistance and armor. Additionally, level 3 Stability decreases cooldown of ALL skills by 50%. |
||
| + | #Default speed: 130%, Sprint speed: 210% |
||
| + | #Default speed: 150%, Sprint speed: 230% |
||
| + | |||
| + | # |
||
| + | |||
| + | *Stability - Holding the Spacebar down will activate Stability. You cannot move, but knockback resistance and armor are increased. Upgrades increase the amount of knockback resistance and armor. Additionally, level 3 Stability decreases cooldown of ALL skills by 50%. |
||
| + | |||
| + | #While Active Armor: +10%, Knockback resistance: +30% |
||
| + | #While Active Armor: +20%, Knockback resistance: +50% |
||
| + | #While Active Armor: +30%, Knockback resistance: +60%, Cooldown of all abilities: -50% |
||
| + | |||
| + | # |
||
| + | |||
| + | *Self-Defense - Allows you to automatically melee attack enemies which are close to you. Upgrades will further increase damage dealt by this attack, and give it a damage range instead of a set number. (Example; 20-40) |
||
| + | |||
| + | # Damage: 15 |
||
| + | #Damage range: 20 to 30 |
||
| + | #Damage range: 30 to 50 |
||
| + | |||
| + | # |
||
| + | |||
| + | *Supplier - Increases your teammates damage and health. Upgrade to further increase damage and health. |
||
| + | |||
| + | #? |
||
| + | # ? |
||
| + | #Health: +30%, Damage: +45 |
||
| + | |||
| + | # |
||
| + | |||
| + | *Berserk - This skill has multiple levels that add on to each other. |
||
| + | |||
| + | #Adds a Berserk meter above your normal health bar, that is filled by getting damaged by enemy attacks, or killing enemies. If filled up, you gain 20% health and 30% attack rate, and faster reload speed. The period that this is active can be extended by getting hurt or killing whilst you're berserk. This is called being "Enraged." |
||
| + | #Pressing the "V" key automatically triggers Rage with a 20 second cooldown. |
||
| + | #Adds a chance to become Enraged when you are about to die, knocking down all enemies nearby, and remaining alive. |
||
| + | |||
| + | # |
||
| + | |||
| + | *Rage Injection - A very useful skill that can make an enemy attack everyone else around them, including their allies. This skill only has one level. Press the keyboard key "X" to activate. You must be holding a pistol to load the injection in the gun, and you must then hit the enemy you wish to enrage. Some enemies are immune, such as the Giant Zombie Troll, the Zombie God Troll, the Super Mutant Overlord, and the Super Mutant Boss. |
||
| + | *Taunt - Pressing "C" draws in surrounding enemies and forces them to attack you. |
||
| + | *Quake Leap - Pressing "F" makes you leap towards the enemy and deal damage to any you land on. |
||
| + | |||
| + | #Damage: 40, Cooldown: 10 seconds |
||
| + | #Damage: 70, Cooldown: 8 seconds |
||
| + | #Damage: 100, Cooldown: 6 seconds |
||
| + | |||
| + | *Collar |
||
| + | |||
| + | #20% (+exp) chance of success |
||
| + | # 40% (+exp) chance of success |
||
| + | #60% (+exp) chance of success . |
||
| + | *Elite Team - Equips teammates with new weapons and armor. |
||
| − | * Self-Defense - Allows you to automatically melee attack enemies which are close to you. Upgrades will further increase damage dealt by this attack, and give it a damage range instead of a set number. (Example; 20-40) |
||
| + | #? |
||
| − | * Supplier- Increases your teammates damage and health. Upgrade to further increase damage and health. |
||
| + | #? |
||
| + | #Soldier gets: Ballistic Sheild, Captain gets: Bazooka, Ranger gets: Minigun |
||
| + | # |
||
| − | * Berserk - This skill has multiple levels that add on to each other. The first level gives a Berserk meter above your normal health bar, that is filled by getting damaged by enemy attacks, or killing enemies. If filled up, you gain 20% health and 30% attack rate, and faster reload speed. The period that this is active can be extended by getting hurt or killing whilst you're berserk.This is called being "Enraged." The second level allows for you to manually become Enraged by tapping the keyboard key "V" (20 second cooldown). The third level has the first two levels, along with a chance to become Enraged when you are about to die, knock down all enemies nearby, and survive. |
||
| − | * Rage Injection - A very useful skill that can make an enemy attack everyone else around them, including their allies. This skill only has one level. Press the keyboard key "X" to activate. You must be holding a pistol to load the injection in the gun, and you must then hit the enemy you wish to enrage. Some enemies are immune, such as the Giant Zombie Troll, the Zombie God Troll, the Super Mutant Overlord, and the Super Mutant Boss. |
||
| − | == |
+ | ==Tips and Tricks== |
| + | [[Tips and tricks (D3)|See here]] |
||
| − | #Preventing kill-stealing: |
||
| − | ##Don't get people to "go to team" until you've cleared an area. This also prevents them from dying. |
||
| − | ##When training militia or cleaning up an area with militia present, direct them to guard the very back of the map (once they've reached their goal, if they have a goal) so you can get all the kills. Only bait low value enemies to militia if you're training them but kill the high value targets |
||
| − | ##If outpost weapons are killing zombies, kill them quickly before the outpost can kill them |
||
| − | #Early On |
||
| − | ##Aim past the enemy you are shooting at. If they are standing you'll still hit them. If you aim at them, sometimes you will miss because the bullet hits at their feet. Enemies who have been knocked down need to be aimed at or kicked. |
||
| − | ##Find the first 3 inspectors as soon as possible. (see their locations above) |
||
| − | ##If you knock an enemy over - walk up to it and you will automatically kick it and gain 300% cash if you kill it. |
||
| − | ##Upgrade Engineering ability to max quickly, in order to build the strongest possible outposts. |
||
| − | ##Upgrade your team size (shelter, not commander) whenever possible. |
||
| − | ##If a zone is being attacked and you do not defend it with the outpost, it will gain 20-60% threat the next day. If the threat goes to 100% or over, you will lose the zone and have to re-scout it. You will not, however, lose any of the upgrades you have made to the zone. (i.e. factory/outpost/shelter). |
||
| − | ###This is useful because it's time consuming and not profitable to defend zones that are being attacked if they aren't going to be lost. Just do something else for a while, and then you can do "Direct Action" to kill zombies for money, and reduce the threat level by 40% |
||
| − | ###If you are early in the game, however, it is advised to not let this threat level go too high, as many powerful enemies such as "Zombie Trolls", or "Giant Zombie Trolls" can spawn, forcing the player to have to get better weapons before trying to take back this area. They can spawn on, or around about 80% threat |
||
| − | #Late game defence missions: |
||
| − | ##Missions where the primary goal is to go and kill enemies is easy. Missions where you need to defend a point are hard. |
||
| − | ##Post the Militia in a line behind you while you go forward and lure the bulk of the invaders. Always spread out your militia. Bunched up troops can be knocked down by a single missile or thrown projectile. |
||
| − | ##The goal is to delay the enemy long enough for the goal to reach 100%. Afterwards, no matter how much damage the building takes, it won't affect the 100% completion. |
||
| − | ##Even though your militia do very little damage, they can draw aggro and delay enemies during what may be a critical time window. They're also immortal and won't die. Even if you lure them next to a propane tank and blow it up and they explode into bloody pieces, your militia upgrade won't go away and next mission, you'll have your militia again. |
||
| − | ##Drop mines when waiting for the wave to arrive. Hold space to get the bonus reload speed from stability. Every little helps. |
||
| − | ##Defence missions are also the only scenario where companions are useful since they act as extra distractions. As Farquad once said "Some of you may die, but that is a sacrifice I am willing to make." |
||
| − | ##If there is a watch tower and you have at least 1 point in Stability, garrison yourself in the watch tower and deploy your milita in a spread out line in front. Being in a tower should allow you to fire at enemies non-stop, even if a few projectiles get thrown at you. Intense fire can force you out, but the threshold is much higher than machine gun or bazooka nests. The militia in front also draw fire for a while, giving you even more time in the tower. |
||
| − | #Once you unlock mines, the "Help Defend" missions become really easy. With even just one point in mines, you can lay down an infinite number of mines. As long as you lay down enough mines to destroy all or most of the zombie wave, you'll be able to get the full reward. Mines are also easy to train using the same tactics. Lay down a huge minefield and then trigger the factory wave or lure enemies over. Use Stability III's faster reload bonus by holding down Space if you have the bonus. |
||
| − | #How to clear/complete an area (once an area is cleared it will not have to be cleared of zombies any longer. Also, the area will turn green.) |
||
| − | ##Build 3 militia upgrades (requires a total of 3 soldiers) |
||
| − | ##Build 3 red outpost main weapon upgrades(requires a total of 3 soldiers) |
||
| − | ##Build 3 red factory upgrades (requires a total of 1 builder and 3 engineers) |
||
| − | ##Mostly or completely clear the area of of zombies |
||
| − | #In a area- what to upgrade first - Try to do the militia upgrades first (although early on, the 3rd and even 2nd can be a bit pricey) Do not upgrade an outpost with weapons until the end - zombies wont attack the outpost this way(unless threat gets above about 80%, and even then, it lets you do "direct action" to take care of it) Also, the outpost's weapons will "steal" kills from you and your militia when you are training them. |
||
| − | #How to find more teammates - Go back to zones and explore. It helps to have the upgraded "Radar", or "Detector" ability to find them, as they will be marked on it as a green dot. |
||
| − | #Guns to upgrade: |
||
| − | ##Early Game - Pistol (100% money per kill is nice), |
||
| − | ##Mid-Game - Minigun, for having high DPS and a generous 100 bullets per magazine, and the Sniper Rifle for taking out many zombies and mutants in a single hit from large distances. |
||
| − | ##Late Game |
||
| − | ###Knife/Machete (300% money per kill allows for upgrading powerful weapons such as the Rocket Launcher more. It also can deal insane amounts of damage per hit.) It's also actually respectable damage |
||
| − | ###Direct explosives for dealing with large amounts of mutants and zombies in higher level areas. (Grenades, and Rocket Launcher.) |
||
| − | ###Mines - you can do something even if you're not firing at an enemy. If the mines are triggered, your damage output has effectively been increased. These are especially useful on levels where waves can be triggered such as "help defend" - don't trigger the wave straight away, lay down enough mines, and then let the mines kill the entire wave. |
||
| − | ###Riot Shield (Very useful, because you will never get knocked over while using this, and it will increase your armor/defense significantly.) |
||
| − | #Important upgrades: |
||
| − | ##Upgrade Engineering to be able to build strong outposts with multiple guns, and passive upgrades, like the Mine Launcher, or Flamethrowers. |
||
| − | ##Agility/Endurance |
||
| − | ###These are by far the most useful skill in the game. |
||
| − | ##Detector - Sense enemies/npc's/locations of stashes/objectives. |
||
| − | ###Get detector I and II as soon as possible. Detector III is can be acquired later on. |
||
| − | ###Unlike what some people thing, the dots don't show up on the minimap (from pressing Z). Instead a crescent appears in the direction of your pointer and the dots give you an indicate of these things' relative direction |
||
| − | ##Stability - Makes you reload twice as fast, gives you armor, makes you resistant to knockbacks - all when you hold the "Spacebar". Simply standing there and gunning enemies down won't work late game due to projectiles, and reduced knockback chance is still knockback chance, but you can use it in clutch situations or bursts. Also, you can use it while in Watchtowers. |
||
| − | ##Anything that can increase your armor, regen speed, or health. |
||
| − | ###Early - Just use cotton shirt. Leveling it up by being damaged will give you a nice 20% armor and 5% more speed. |
||
| − | ###Mid/Late - Heavy Armor, More armor but 30% reduced move speed, or Cotton Armor for harder difficulties to be able to avoid more devastating attacks that armor cannot withstand. (Example: Zombie Trolls, Super Mutants, and even Burning Ghouls can all be devastating, and it's best to avoid their attacks altogether.) |
||
| − | ###Riot Shield (Increases armor by a lot, decreases the rate in which you get knocked down and comes with a reliable pistol.) |
||
| − | #Upgrades that aren't as important: |
||
| − | ##Hacker III - ATM's do not give you much cash throughout the game - it costs just as much, or more to upgrade the hacker skill to level 3 as you will ever get for ATMs. |
||
| − | ##Most guns aren't very powerful, or that great. Just pick a few guns you like and upgrade those. Of course, you can still purchase more fun weapons, and come up with your own exciting load outs. (Example: Using the Rocket Launcher, Grenades, and Landmines for maximum explosions, baby!) |
||
| − | ##Things that benefit your teammates - Any upgrade that makes your teammates stronger isn't very useful, you'll be doing a lot of missions solo, anyways. Getting team mates and making them healthier only really matters when you need as much meat shield as possible to stall for time and that's well into the lategame. |
||
| − | ##Self-Defence - This can actually interrupt you from doing what you actually want to do, such as run. Not worth it, IMO. |
||
| − | #Armor: Once you have 2 points in Stamina, you can train up your armour by standing right next to small barrels and then blowing them up or simply letting one or two weak zombies hit you repeatedly. If you reach a point where you absolutely need every bit of tankiness you can get, you'll need to do this to train up your tankiest available armour. Early on, it's better to be mobile so missions are cleared faster and so you can run away from projectiles. Late game, when you have dozens of enemies and projectiles flying at you, you won't be able to void taking hits no matter how good you are, so you'll eventually need to switch to the tankiest armour and train it up. |
||
| − | #Outpost upgrades: |
||
| − | ##Best outpost main weapons upgrades - Good combos - 1 Rocket launcher, 1 Anti-tank, 1 Mini Gun | 3 rockets | 3 Anti-tank | 1 Mini Gun and 2 Anti-tank. The Rifle upgrade can also be useful, due to it typically instantly killing a zombie every shot, and you don't have to aim the cross-hair directly over the zombie to hit them, it gives some auto-aim for you. |
||
| − | ##Terrible combo's: 3 Mini Guns, makes it harder on yourself to defend against the large hordes of zombies. |
||
| − | ##Best side upgrades: Major, Sergeant, General, Accountant (after upkeep exceeds 150), Gate, Decoy (after area secured and if you intend to do several levels of Beacon) |
||
| − | ##Decent side upgrades: Mine Launcher, Grenade Launcher, Gunners, Flamethrower, Walls, Repeller (If you plan to leave the area unsecured for a long time), Hunter (if you intend to do many, many levels of Beacon) |
||
| − | #Making money - |
||
| − | ##Killin stuff - works alright for $$. It's good to use melee(300% $) and the pistol(100% $) to get more money per kill. Also remember to destroy barrels ($5), cardboard boxes ($5), looted ATMs ($50) and propane tanks ($150) when you go through. (Assuming this won't kill survivors you're trying to recruit) Those numbers can add up, especially if you're going for a speedrun. |
||
| − | ###Even against tough enemies, you can use stronger weapons to weaken them first, before switching to melee/pistol. It's the killing blow which matters. |
||
| − | ##Engineers(150) and Citizens(100) on team - It's nice to keep Engineers and Citizens on your team because they make 150 and 100 gold, respectively, per day. If you can find a ton of engineers, they should make up the bulk of your team until you no longer need money. |
||
| − | ##Factories - if you want to completely secure an area, you'll need to upgrade your Factories anyway. They'll increase threat until the area is completely secured, though. The first level costs a Builder, who doesn't generate money anyway, and gives you $50 per turn. The next level costs an Engineer, and gives you another $100 per turn. This is $50 less than if you just kept the Engineer. The last level costs 2 Engineers and gives you another $200 per turn, again, less than if you simply kept the Engineer on your team. However, this is only true if you don't get any automated machine upgrades for your factories, which cost builders (no income) and give you another $10 per turn per upgrade. It also frees up slots on your team to put even more members in. |
||
| − | ##Mid to Late game, you can do certain zones over and over again and that lets you make extra money and level up your weapons/armor. |
||
| − | #Time - Days: Don't worry about spending too many days. If you need to skip a day to make money, increase threat to get more zombies to kill, it's fine. It doesn't matter how long (in in-game days) it takes to complete it. |
||
| − | #Finding Teammates: |
||
| − | ##By far the best way to acquire team mates is by exploring missions you've already completed. You can even go to an area once, gain teammates from it, and then go again a few days later and gain more teammates. |
||
| − | ##Border Area (the first area) - Mission I is a good place to do once every 5-10 days or so. normally you can find 3 - 4 new teammates there. |
||
| − | ###Mission 1 in all areas seems to be a pretty good place to find team mates. (Source: I just found 15 teammates at once by exploring mission 1 of West Side area.) |
||
| − | ###Westside 1 has the second most spawn points of all maps and it's a Tier 2 map. You won't get a better area until you have Grayditch 1 (Tier 4 map), but even then, you'll need to clear out most of the zombies so the survivors aren't killed as soon as they spawn. |
||
| − | ##Don't recruit team mates until you've cleared the area. This minimizes their chances of dying. |
||
| − | #The 8th wave of Beacon is just nothing but Giants. It will be extremely difficult to beat with 3 Minigun and can be beaten with 0 damage with 3 Missile Launchers. |
||
| − | [[Category:Decision]] |
||
[[Category:Decision 3]] |
[[Category:Decision 3]] |
||
| − | [[Category:FlyAnvil]] |
||
| − | [[Category:Enemies]] |
||
Latest revision as of 23:03, 13 December 2022
Decision 3 is the 4th game of the Decision series that was released on November 14, 2014.
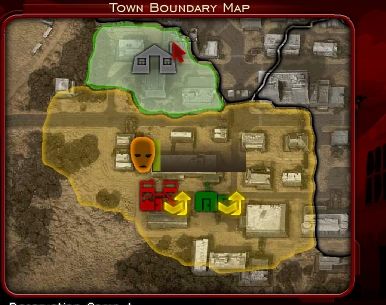
Decision 3 :Town Boundary Map
Storyline
Following their success in Decision 2 the survivor pushes on into yet another infested city.
The City
- Border area
- Coldwater area
- Massacre
- Westside area
- Commonwealth area
- Grayditch area
- Den
- Broken Hills area
- Freeside area
- Reservation Camps A, B and C
Enemies
The city has been overrun by zombies in the south west and a powerful mutant faction in the north east.
Zombies
- Zombie Roamer
- Zombie Reaver
- Feral Zombie
- Burning Ghoul
- Marked Ghoul
- Zombie Dog
- Zombie Warg
- Zombie Troll
- Giant Zombie Troll
- Zombie God Troll (Found at the bottom of Massacre)
Mutants
- Mutant Peon
- Mutant Warrior
- Mutant Brute
- Mutant Master
- Mutant Captain
- Wolf Mutant
- Wulver Mutant
- Super Mutant
- Super Mutant Overlord
- Super Mutant Boss (Find in the bottom of the right of Den and in the Freeside area)
Weapons
| Class/Name | Max damage | + max exp | Best reload | Clip | Distance | Reward | Notes |
|---|---|---|---|---|---|---|---|
| 01P1 / Colt Python | 100% | Fires rage | |||||
| 01P2 / Beretta Cheetah | 56 | 2 | 10 | 600 | 100% | Fires rage | |
| 01P3 / Desert Eagle | 100 | 140 | 2 | 15 | 800 | 100% | Fires rage |
| 02S1 / Coach Gun | 60 | 300 | 70% | ||||
| 02S2 / Winchester | 120 | 350 | 70% | ||||
| 02S3 / Remington | 200 | 400 | 70% | ||||
| 03A1 / MP5 | 70% | ||||||
| 03A2 / AK74 | 70% | ||||||
| 03A3 / M60 | 70 | 3 | 40 | 700 | 70% | ||
| 04SR1 / Enfield | 70% | ||||||
| 04SR2 / Dragunov | 70% | ||||||
| 04SR3 / Barrett | 210 | 260 | 1700 | 70% | |||
| 05MG1 / Browning | 60% | ||||||
| 05MG2 / Slostin | 60% | ||||||
| 05MG3 / Minigun | 70 | 5 | 40 | 600 | 60% | ||
| 06RL1 / Bazooka | 84 | 4 | 1 | 70% | - Move | ||
| 06RL2 / RPG | 123 | 4 | 1 | 70% | - Move | ||
| 06RL3 / Stinger | 185 | 4 | 1 | 70% | - Move | ||
| 07G1 / Mills Bomb | 1 | 30% | |||||
| 07G2 / F1 Grenade | 1 | 30% | |||||
| 07G3 / Z Grenade | 130 | 3 | 1 | 30% | |||
| 08Mi / Panzermine | 250 | 320 | 1.5 | 1 | 70% | ||
| 09F1 / ROKS Flamethrower | |||||||
| 09F2 / Flammenwerfer | 56 | 5 | 70% | - Move | |||
| 09F3 / M2 Flamethrower | 100 | 3 | |||||
| 10Me1 / Combat Knife | 0 | 0 | 0 | 300% | |||
| 10Me2 / Crowbar | 0 | 0 | 0 | 300% | |||
| 10Me3 / Machete | 250 | 280 | 0 | 0 | 0 | 300% | |
| 11S / Ballistic Shield | 120 | 160 | 800 | 80% | Fires rage
+ Armor | ||
| 12B / Phantom Bow | 130 | 1 | 1500 | 70% |
Teammates
Soldier
Soldiers are required for most Outpost and Shelter upgrades. They can also be recruited for missions with the "Commander" ability for 100 Money. Not to confused with their non-interactable "Military" variant.
Captain
Captains are required for some Outpost and Factory upgrades. They can also be recruited for missions with the "Commander" ability for 150 Money.
Ranger
Rangers are required for Outpost upgrades and each one in the team creates 5 Materials per day. They can also be recruited for missions with the "Commander" ability for 100 Money.
Engineer
Engineers are required for Outpost and Factory upgrades and each one in the team earns 150 Money per day.
Builder
Builders are required for Outpost and Factory upgrades upgrades and each one in the team creates 5 Materials per day.
Citizen

Citizens are required for Shelter upgrades and each one in the team earns 100 Money per day.
Inspectors
Decision 3 also introduces Inspectors, a group of NPCs who can be found throughout the city and once guided to shelter unlock more weapons, armour and abilities.
- Armord - Border Area
- Jonson - Coldwater Area
- Mark - Westside Area
- Rob - Commonwealth Area
- Rock - Broken Hills Area
- Porterfield - Freeside Area (Can't be found on Easy difficulty)
Armor
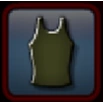
Underwear
- Armor: 25% (5% + 20% exp)
- Speed: +5%
In-game description: "Typical army jersey made of cotton. Provides no protection against damage. Does not hinder movements so you can run in it only where there is a lack of threat."
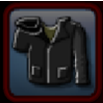
Leather Jacket
- Starting armor:
- Max armor: 45% (25% + 20% exp)
- Speed: -10%
In-game description: "Lightweight body armor composed of ceramic plates. Mainly protects human torso. Reduces damage and has a negligible effect on the ability to move."
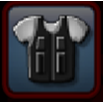
Combat Armor
- Starting armor: 15%
- Max armor: 60% (40% + 20% exp)
- Speed: -20%
In-game description: "Medium leather armor with stitched metal plates. Protects the entire upper part of the body. The best ratio between the protection from damage and mobility. Reduces damage and reduces speed of movement."

Kevlar Armor
- Starting armor: 20%
- Max armor: 80% (60% + 20% exp)
- Speed: -30%
In-game description: "Heavy armor made from balistic fabric and titanium plates. Protects the entire human body from any kind of damage to the maximum. Because of the heavy weight most often used only for defensive purposes. Significantly reduces damage however, greatly reduces the movement speed."
Skills
All skills max out at level 3, except for Rage Injection and Taunt.
- Stamina - Increases maximum health and regeneration rate.
- Max Health: 250, Regeneration: 6 per second.
- Max Health: 300, Regeneration: 12 per second.
- Max Health: 370, Regeneration: 16 per second.
- Engineering - In game description: "Engineering allows improvement of Outposts, Factories and Shelters to a higher level."
- ?
- ?
- Required for: Third Outpost Armament upgrade Workshops III, the Factory upgrade.
- Hacker - Allows you to "hack" into ATMs, which gets you cash. You can only hack into ATMs that are at or below your hacking level. Along with that, you can hack into Storehouses, which are harder to find.
- Access to Level 1 ATMs and Storehouses.
- Access to Level 2 ATMs and Storehouses.
- Access to Level 3 ATMs and Storehouses.
- Detector - Gives an in-game map that can be accessed anytime, and upgrades allow you to see more things, such as enemies, allies, and stashes. Tap the keyboard key "Z" to activate (and deactivate) the detector (if unlocked). Hold "Z" to access the map.
- Detects Enemies (Red/Red with skull) and Useful places (Yellow).
- Detects Enemies (Red/Red with skull), Useful places (Yellow), Allies (Green) and Loot (Pink).
- Detects Enemies (Red/Red with skull), Useful places (Yellow), Allies (Green), Loot (Pink) and Stashes (Blue).
- Commander - Lets you have companions that follow you around and kill zombies. Upgrade to increase max team size.
- Space for 1 companions
- Space for 3 companions
- Space for 6 companions.
- Agility - Improves default walking speed and lets you sprint if you hold the "Shift" key on your keyboard, which doesn't allow you to fire, but increases speed drastically. Upgrading this will further increase your walking speed, sprinting speed, and duration of the sprint.
- Default speed: 110%, Sprint speed: 140%
- Default speed: 130%, Sprint speed: 210%
- Default speed: 150%, Sprint speed: 230%
- Stability - Holding the Spacebar down will activate Stability. You cannot move, but knockback resistance and armor are increased. Upgrades increase the amount of knockback resistance and armor. Additionally, level 3 Stability decreases cooldown of ALL skills by 50%.
- While Active Armor: +10%, Knockback resistance: +30%
- While Active Armor: +20%, Knockback resistance: +50%
- While Active Armor: +30%, Knockback resistance: +60%, Cooldown of all abilities: -50%
- Self-Defense - Allows you to automatically melee attack enemies which are close to you. Upgrades will further increase damage dealt by this attack, and give it a damage range instead of a set number. (Example; 20-40)
- Damage: 15
- Damage range: 20 to 30
- Damage range: 30 to 50
- Supplier - Increases your teammates damage and health. Upgrade to further increase damage and health.
- ?
- ?
- Health: +30%, Damage: +45
- Berserk - This skill has multiple levels that add on to each other.
- Adds a Berserk meter above your normal health bar, that is filled by getting damaged by enemy attacks, or killing enemies. If filled up, you gain 20% health and 30% attack rate, and faster reload speed. The period that this is active can be extended by getting hurt or killing whilst you're berserk. This is called being "Enraged."
- Pressing the "V" key automatically triggers Rage with a 20 second cooldown.
- Adds a chance to become Enraged when you are about to die, knocking down all enemies nearby, and remaining alive.
- Rage Injection - A very useful skill that can make an enemy attack everyone else around them, including their allies. This skill only has one level. Press the keyboard key "X" to activate. You must be holding a pistol to load the injection in the gun, and you must then hit the enemy you wish to enrage. Some enemies are immune, such as the Giant Zombie Troll, the Zombie God Troll, the Super Mutant Overlord, and the Super Mutant Boss.
- Taunt - Pressing "C" draws in surrounding enemies and forces them to attack you.
- Quake Leap - Pressing "F" makes you leap towards the enemy and deal damage to any you land on.
- Damage: 40, Cooldown: 10 seconds
- Damage: 70, Cooldown: 8 seconds
- Damage: 100, Cooldown: 6 seconds
- Collar
- 20% (+exp) chance of success
- 40% (+exp) chance of success
- 60% (+exp) chance of success .
- Elite Team - Equips teammates with new weapons and armor.
- ?
- ?
- Soldier gets: Ballistic Sheild, Captain gets: Bazooka, Ranger gets: Minigun